The Ultimate Guide to Succulent Cactus Repotting

Succulent cacti are beloved for their resilience, low-maintenance care, and unique beauty. However, like all plants, they occasionally need repotting to ensure healthy growth and thriving roots. This guide dives into the ins and outs of succulent cactus repotting, from when to repot to the best soil mix and aftercare tips.
Understanding the Importance of Repotting
Why Succulent Cactus Repotting is Essential
Repotting is vital for maintaining the health of your succulent cactus. Over time, roots outgrow the pot, leading to overcrowding. This limits nutrient absorption, stunts growth, and can harm the plant. Repotting ensures your cactus has room to grow and access to fresh nutrients.
Replacing old soil with nutrient-rich cactus improves the plant’s overall health. Old soil tends to compact, reducing drainage and air circulation. This can cause root rot, one of the leading issues with succulent care.
Signs That Your Cactus Needs Repotting
Some clear signs indicate your succulent cactus needs a new pot:
- Roots growing through drainage holes: This means the roots are outgrowing the container.
- Soil dries out too quickly: Overcrowded roots may absorb water too fast.
- Stunted growth: The plant stops growing despite regular care.
- Salt buildup: The white crust on the soil surface suggests old, depleted soil.
Recognizing these signs early ensures timely repotting, helping your cactus thrive.
How Often Should You Repot Succulent Cacti?
Most succulent cacti benefit from repotting every 1-2 years. Younger plants may need repotting more frequently as they grow faster. Mature cacti can be repotted less often unless the soil becomes compacted or the plant outgrows its container.
Keep in mind that some species of cacti grow slower and may not require frequent repotting.
Choosing the Right Pot for Your Succulent Cactus
Material: Terracotta vs. Plastic Pots
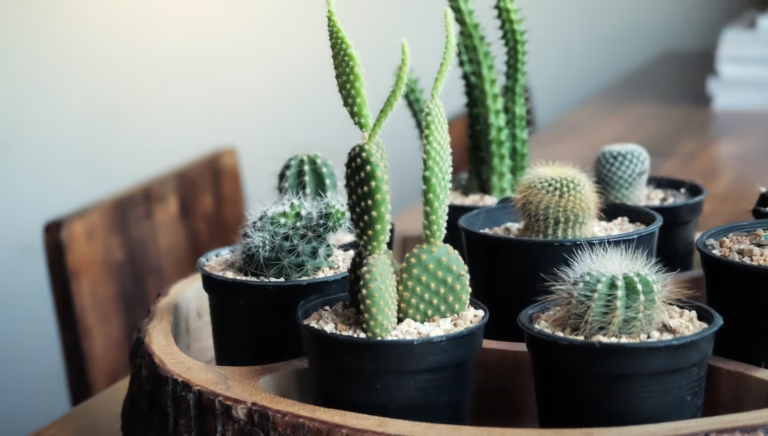
When selecting a pot, consider the material. Terracotta pots are ideal for succulent cacti because they are porous, allowing air circulation and better evaporation of excess moisture. This prevents overwatering, a common issue with succulents.
Plastic pots, while lightweight and affordable, retain moisture for longer. If you opt for plastic, monitor your watering schedule closely to avoid root rot.
Size: How Big Should the Pot Be?
Choose a pot slightly larger than the cactus’s current container. Avoid oversized pots, as excess soil can retain water and increase the risk of overwatering. The ideal size should allow about an inch of space between the roots and the pot’s edges.
A snug fit ensures the plant remains stable and prevents soil from staying too wet.
Drainage: The Key to Success
A good succulent cactus pot must have drainage holes. These holes allow excess water to escape, preventing waterlogging and root rot. If your chosen pot lacks drainage holes, consider adding them or using them as a decorative outer container with a functional inner pot.
Preparing for the Repotting Process
Gathering the Necessary Tools
Before starting the repotting process, gather the tools you’ll need:
- A new pot with drainage holes
- Cactus or succulent soil mix
- Gardening gloves (to protect against spines)
- Tongs or a towel (for handling spiny cacti)
- A small trowel or scoop
Having everything ready will make the process smoother and stress-free for you and your plant.
Sterilizing the New Pot
To prevent transferring diseases or pests, sterilize the new pot. Rinse it with hot water and scrub away any dirt or debris. If it’s a reused pot, soak it in a mixture of water and mild bleach for 15 minutes, then rinse thoroughly.
Clean pots create a healthier environment for your succulent cactus.
Preparing the Soil Mix
Use a well-draining cactus and succulent soil mix. Avoid regular potting soil, as it retains too much moisture. A good mix typically includes:
- Sand or pumice for drainage
- Perlite or vermiculite to aerate the soil
- Compost or organic matter for nutrients
You can also customize your soil mix based on your cactus’s specific needs.
The Step-by-Step Repotting Process
Removing the Succulent Cactus from Its Old Pot
To remove the cactus, gently loosen the soil around the edges of the pot. Grip the cactus using tongs or wrap it in a towel to avoid spines. Slowly pull it out, being careful not to damage the roots.
If the roots are stuck, tap the sides of the pot or use a blunt knife to loosen the soil.
Examining the Roots
Inspect the roots for signs of rot, pests, or disease. Healthy roots are firm and white or light-colored. Trim any mushy, black, or brown roots with sterilized scissors. This prevents the spreading of rot to healthy parts of the plant.
Let the cactus sit out for a few hours after trimming to allow the cuts to callous over.
Placing the Cactus in Its New Pot
Add a layer of fresh soil mix to the bottom of the new pot. Position the cactus in the center and fill the sides with soil, gently pressing it down. Ensure the cactus sits at the same depth as it was in the previous pot.
Leave about half an inch of space at the top for watering.
Aftercare for Repotted Succulent Cacti
Watering Guidelines
Avoid watering immediately after repotting. Allow the cactus to adjust and heal for 5-7 days. Once it has settled, water lightly, ensuring the soil dries out completely between waterings.
Overwatering is a common mistake, so always check the soil moisture before watering again.
Providing the Right Light
Place your cactus in bright, indirect sunlight after repotting. Avoid exposing it to intense direct sunlight immediately, as the plant may be stressed from the move. Gradually reintroduce it to full sun over a week.
Proper lighting encourages healthy growth and prevents stretching.
Monitoring for Stress Signs
After repotting, watch for signs of stress, such as yellowing, wilting, or dropping spines. These may indicate overwatering, poor soil drainage, or insufficient light. Address any issues promptly to ensure your cactus recovers.
Common Mistakes to Avoid When Repotting Succulent Cacti
Using the Wrong Soil Mix
One of the most common errors in succulent cactus repotting is using a standard potting mix. Regular potting soil retains too much moisture, which can lead to root rot—a major issue for drought-tolerant plants like cacti.
Instead, opt for a cactus and succulent soil mix designed for optimal drainage and aeration. These mixes typically contain:
- Sand or pumice to improve drainage.
- Perlite or vermiculite for aeration.
- Organic material, like compost, for nutrients.
If you prefer a DIY approach, mix two parts sand or pumice with one part compost or potting soil. This ensures your cactus has the right environment for healthy root growth.
Repotting Too Frequently
While repotting benefits succulent cacti, doing it too often can stress the plant. Succulents thrive when left undisturbed, as they grow slowly and don’t need frequent changes. Over-repotting can also damage the roots, reducing the plant’s ability to absorb water and nutrients.
Most cacti require repotting every 1-2 years. For mature plants, consider repotting every 2-3 years unless there are clear signs that they need a new pot or soil.
Neglecting Drainage
Choosing a pot without proper drainage is another critical mistake. Drainage holes are non-negotiable for succulents and cacti. Without them, water collects at the bottom of the pot, leading to soggy soil and eventual root rot.
If you have a decorative pot without drainage holes, use it as an outer pot while placing your cactus in a smaller pot with drainage inside it. This way, you can still ensure proper water management.
Benefits of Repotting Succulent Cacti
Improved Root Health
Repotting succulent cacti allows the roots to spread and grow freely, which improves nutrient absorption. Over time, roots can become bound in small pots, limiting their ability to support the plant. By moving your cactus to a slightly larger pot, you give the roots room to thrive.
Additionally, removing old, compacted soil during repotting allows you to refresh the plant’s environment with nutrient-rich, well-draining soil. Healthy roots are the foundation of a thriving succulent cactus.
Prevents Pests and Diseases
Old soil can harbor pests such as fungus gnats, mealybugs, and mites, as well as diseases that can affect your cactus’s health. Repotting allows you to inspect the roots for any signs of pests or rot.
When you replace the old soil with a fresh mix, you significantly reduce the risk of these problems. This is especially important if you’ve noticed stunted growth or discolored leaves.
Boosts Growth and Aesthetics
Repotting not only promotes healthy growth but also improves the overall appearance of your cactus. A larger pot with fresh soil provides more nutrients and allows the plant to expand naturally.
Additionally, repotting lets you choose a new, decorative pot that complements your interior or garden design. It’s a great way to refresh the look of your plants while ensuring their health.
Seasonal Considerations for Repotting
Best Time to Repot Succulent Cacti
The ideal time to repot succulent cacti is during their active growing season, which is typically spring or early summer. During this period, the plant is actively growing and can recover more quickly from the stress of repotting.
Avoid repotting during dormancy, often in winter, as the cactus may struggle to adjust and heal.
Weather Conditions to Consider
When repotting outdoor succulents, pay attention to the weather. Avoid repotting on extremely hot or rainy days. Excessive heat can dry out the roots too quickly, while rain can saturate the soil before the plant has adjusted.
Choose a day with moderate temperatures and indirect sunlight to minimize stress on the plant.
Seasonal Aftercare Tips
After repotting, place the cactus in a shaded, sheltered location for about a week. This allows the plant to recover and adapt to its new pot without the added stress of direct sunlight. Gradually reintroduce it to full sunlight over the following weeks.
During winter dormancy, reduce watering and avoid fertilizing recently repotted cacti, as their growth slows significantly.
Repotting Succulent Cactus for Beginners
Choosing Beginner-Friendly Plants
If you’re new to repotting succulents, start with beginner-friendly varieties like:
- Echeveria
- Haworthia
- Jade plants
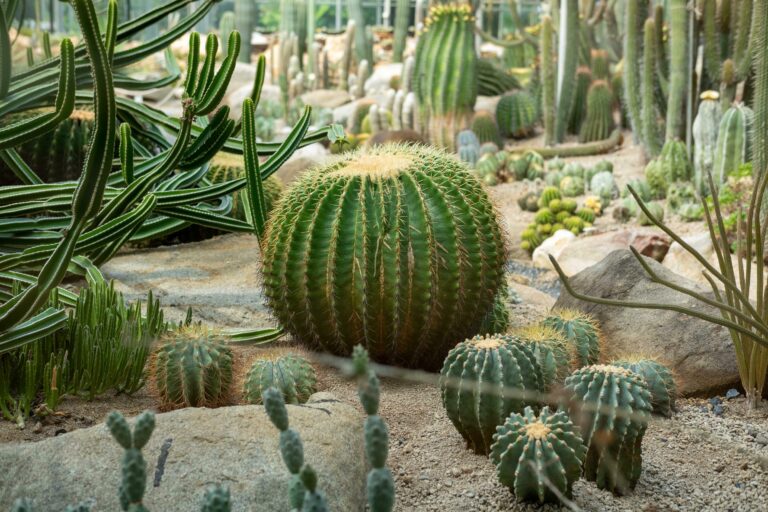
- Golden barrel cactus
These plants are hardy and more forgiving of mistakes, making them ideal for practice.
Step-by-Step Guide for First-Timers
- Prepare your tools: Gather gloves, a pot with drainage, and a suitable soil mix.
- Remove the cactus: Gently loosen the soil and lift the plant.
- Inspect the roots: Check for rot or pests and trim unhealthy roots.
- Add soil to the new pot: Place a layer of fresh soil at the bottom.
- Position the plant: Center the cactus in the new pot and fill in the sides with soil.
- Let it rest: Avoid watering for at least a week to allow the roots to heal.
Common Challenges for Beginners
Beginners often struggle with overwatering after repotting, which can lead to root rot. Additionally, handling spiny cacti can be tricky, so always use tongs or thick gloves to protect your hands.
Start with small cacti to build your confidence before tackling larger, more challenging plants.
Advanced Tips for Experienced Gardeners
Repotting Rare or Large Cacti
For rare or large cacti, use extra caution to prevent damage during repotting. Enlist a helper for heavy or awkward plants, and consider using a wooden stake or plant support to stabilize tall cacti during the process.
Creating Custom Soil Mixes
Experienced gardeners can experiment with custom soil mixes to meet specific plant needs. For instance, some cacti thrive with a higher percentage of sand, while others prefer more organic material for added nutrients.
Fertilizing After Repotting
While you should wait 4-6 weeks after repotting to fertilize, advanced gardeners can tailor fertilizers to specific cacti. Use a balanced, diluted cactus fertilizer to promote healthy growth.
Troubleshooting Repotting Issues
Yellowing or Wilting After Repotting
If your cactus turns yellow or wilts, it may be overwatered or exposed to too much direct sunlight. Adjust the watering schedule and move the plant to a shaded area to recover.
Root Rot Detection and Prevention
If you notice mushy roots or a foul smell, act quickly to save the plant. Trim affected roots, sterilize the pot, and repot the cactus in fresh, dry soil.
Pests Emerging After Repotting
Pests like fungus gnats can appear in moist soil. Reduce watering and consider using a natural pest control method, like neem oil, to eliminate the problem.
Eco-Friendly Practices in Succulent Cactus Repotting
Recycling Old Soil
Instead of discarding old soil, compost it or use it in your garden. Adding it to flower beds or outdoor plants minimizes waste.
Choosing Sustainable Pots
Opt for biodegradable pots or upcycled containers to reduce your environmental impact. Terracotta and ceramic pots are eco-friendly and long-lasting.
Water Conservation Tips
Succulent cacti thrive with minimal water. Use rainwater or recycled water for irrigation to practice sustainable gardening.
FAQs
1. How often should I repot my succulent cactus? Every 1-2 years, or when the roots outgrow the pot.
2. What type of soil is best for succulent cacti? A well-draining cactus and succulent mix with sand, perlite, and organic matter.
3. Can I reuse the old pot for repotting? Yes, but sterilize it first to prevent pests or diseases.
4. Should I fertilize immediately after repotting? Wait 4-6 weeks to avoid stressing the plant.
5. How do I handle spiny cacti during repotting? Use tongs, and thick gloves, or wrap the cactus in a towel for safe handling.
Conclusion
Succulent cactus repotting is a rewarding task that ensures your plants remain healthy, vibrant, and aesthetically pleasing. By following the right steps, choosing suitable materials, and practicing proper aftercare, you can give your cacti the best environment to thrive.
Whether you’re a beginner or an experienced gardener, repotting provides an opportunity to deepen your connection with these fascinating plants while improving your gardening skills. With proper attention and care, your succulent cacti will continue to enhance your home or garden for years to come.


